I did not do this project because I was busy with my empty bowls and other stuff. I had shower curtain hangers and I was going to use two of them as eyes in a baby face but I didn't have time.
0 Comments
I did not do this project because I was busy with my empty bowls and other stuff. I had shower curtain hangers and I was going to use two of them as eyes in a baby face but I didn't have time.
0 Comments
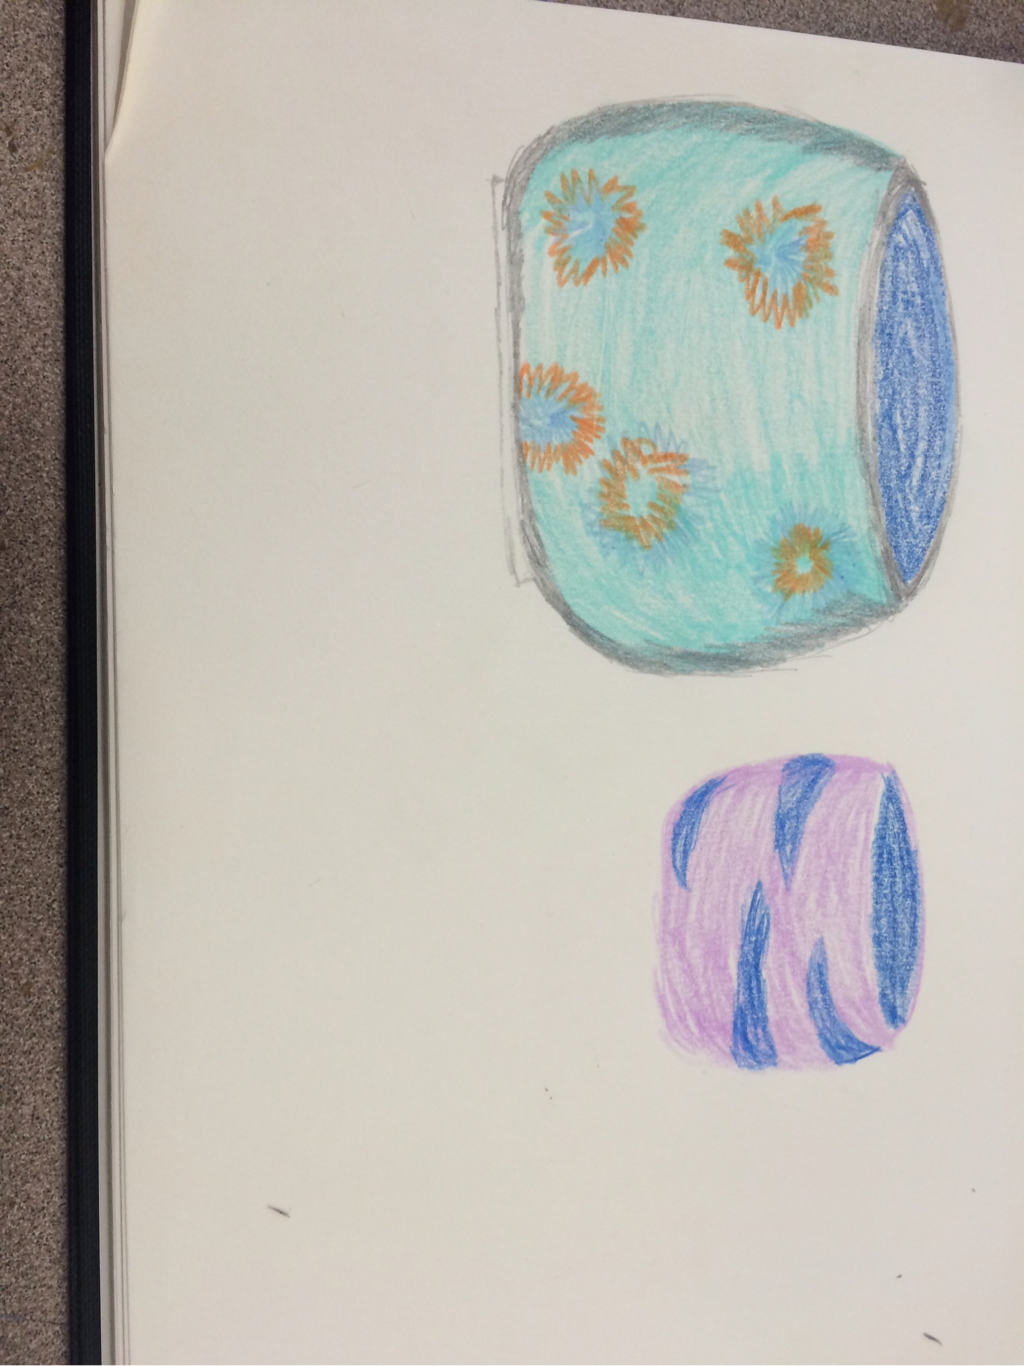 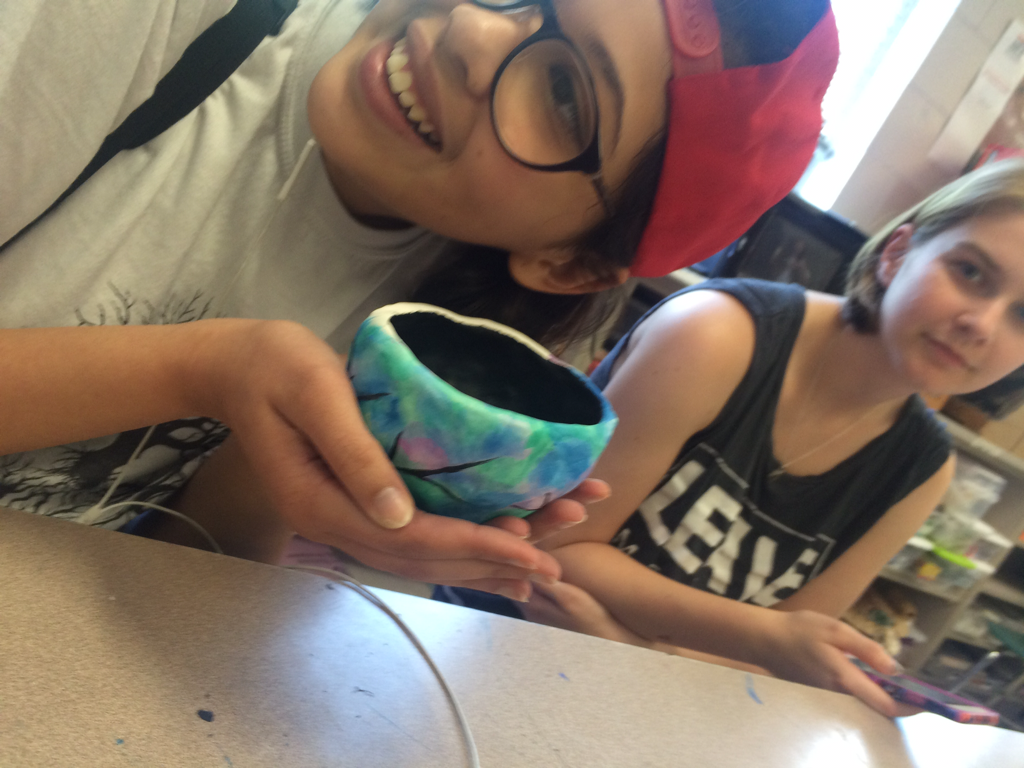 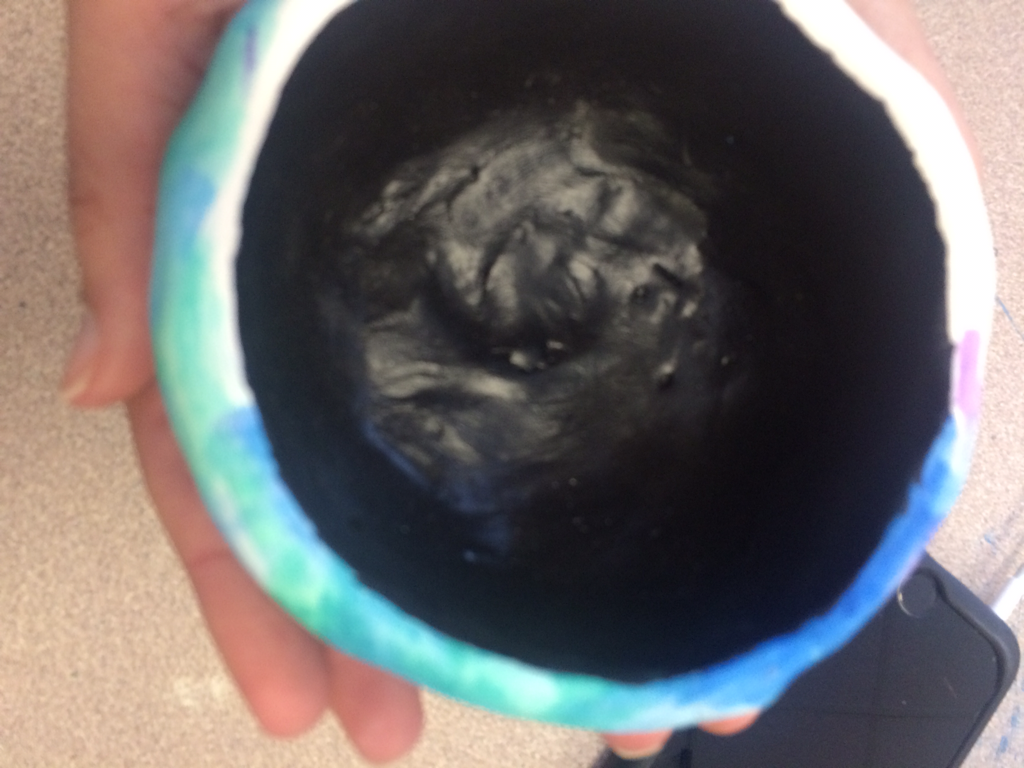 I had to draw two of my bowls because they went missing and I'm pretty sure they are gone forever but I made all of them with clay and then glazed two of them and the watercolor for the last one. The water color on was a pinch pot and I did the other two on the wheel. The bowls turned out pretty well. The wheel was hard at first but after a couple of tries I think I got the hang of it.
 I never got a chance to work on this project so I sketched out my plan for it. If I had the chance to do it I would have used an actual piece of a branch to use as the base and then I would have built the base and trunk of the tree with two different sizes of wire. And then have the thicker wires branch off from the trunk and the thinner wires will branch off the thick branches. Then I would have taken thin white wires to create the flowers.
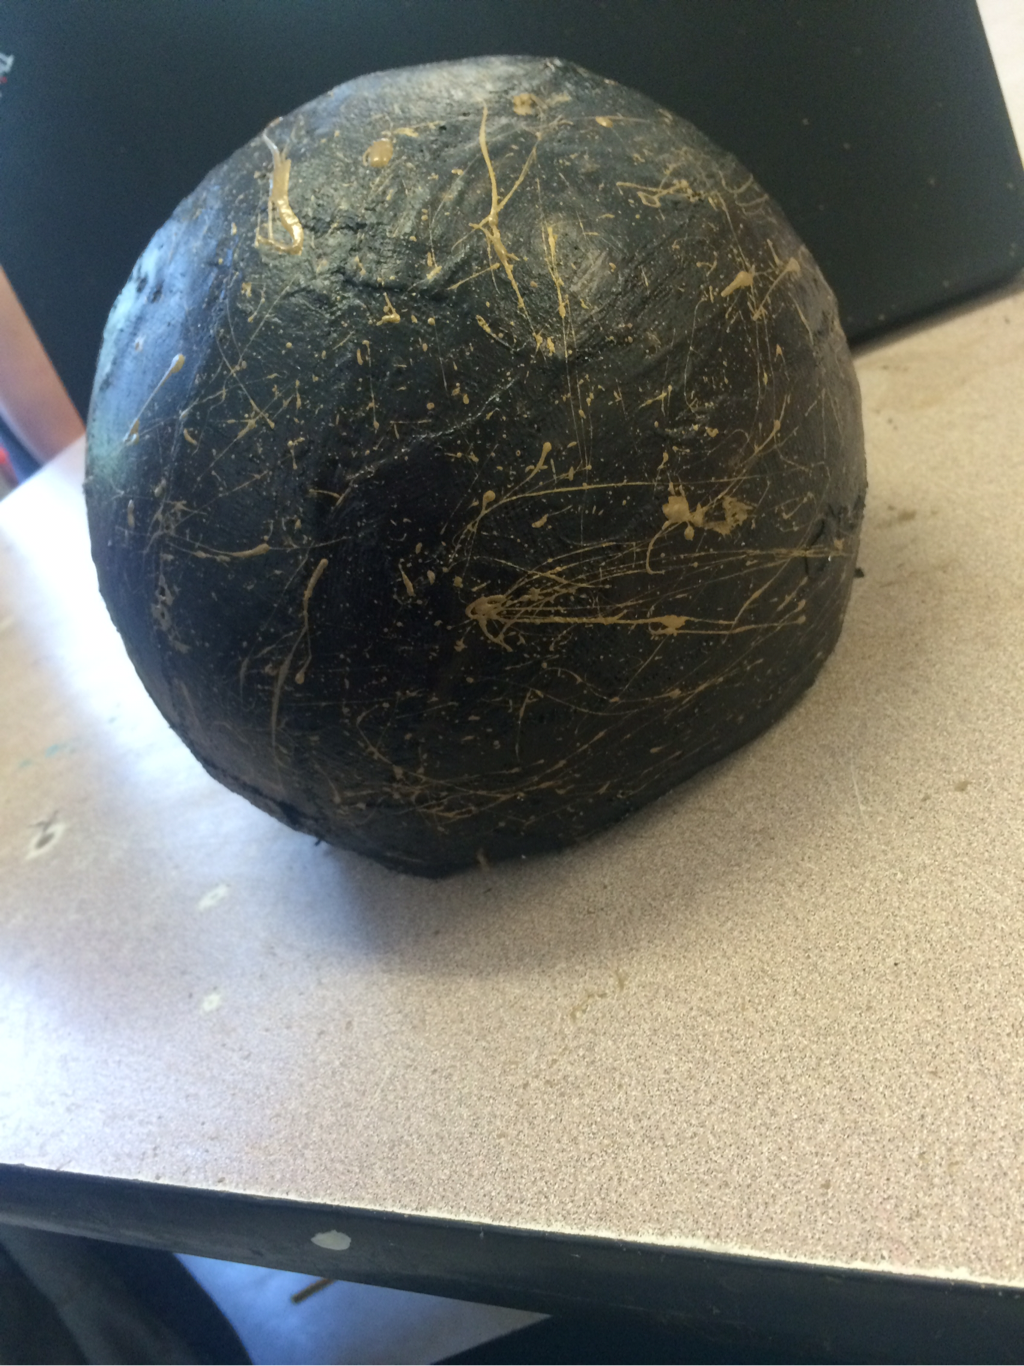 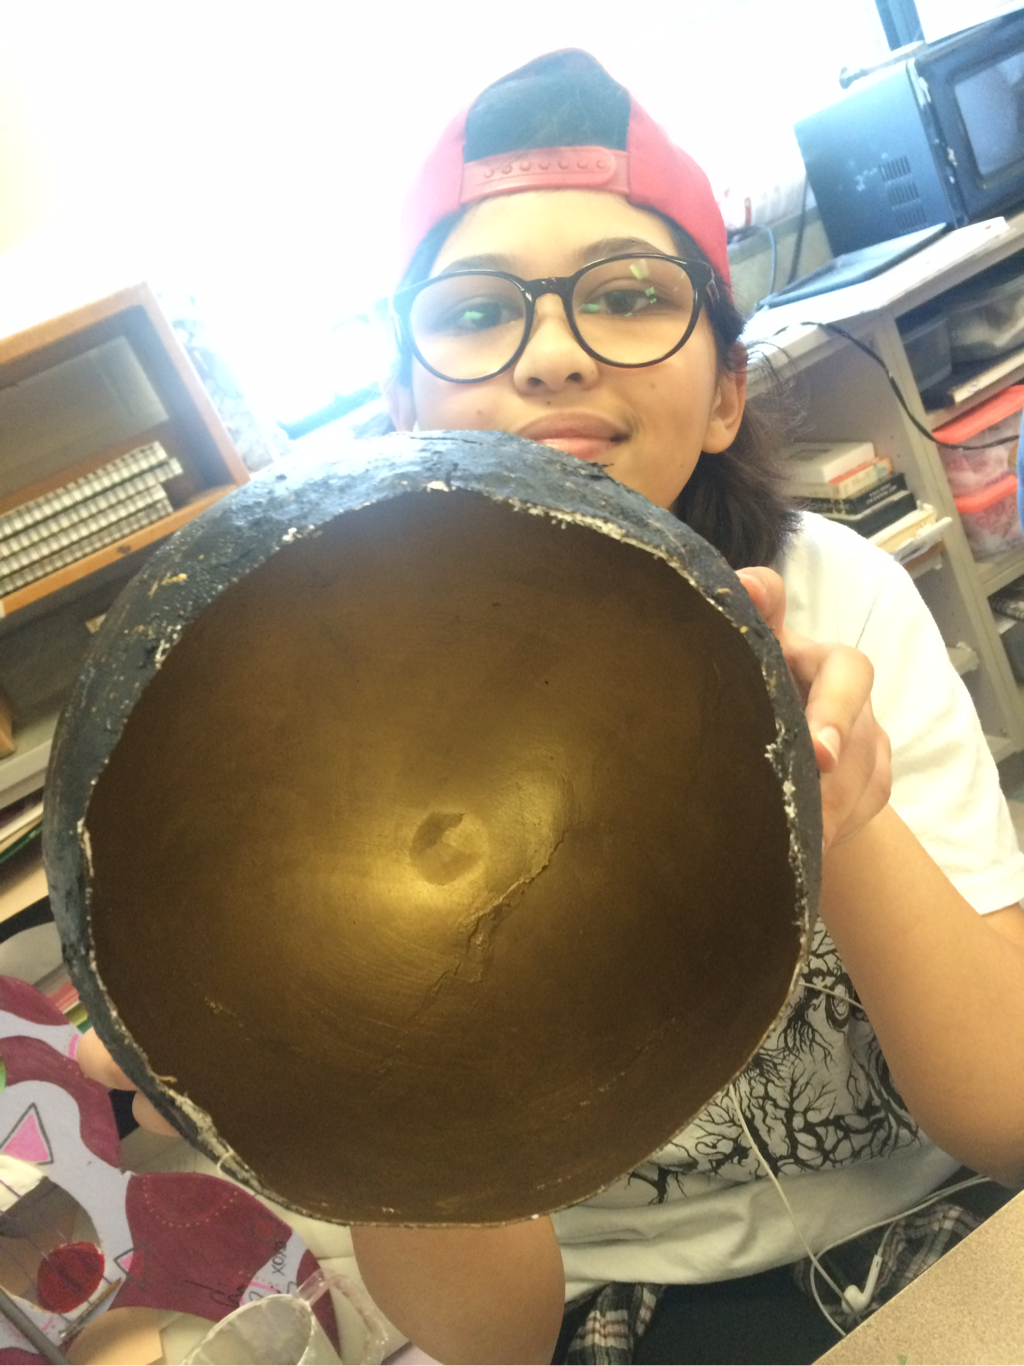 In the installation parachute piece we started by blowing up a ballon and coating it with plaster paper mache. Personally I had to pop my ballon to get it out of my shell but if you didn't cover it as much you can also just pull the ballon out. Once the plaster is dry you can sand it to make it dry. And then you're ready to decorate it however you please. This is my assistant Victoria she wanted to be in the picture to make it less boring. She also helped me with the idea of gold splatters on a black background. I kind of have a running theme of black In all of my pieces. The ideas seem pretty good, but I would have rather done the idea where everyone put In an aspect of the big cloud idea. I think the parasutes turned out okay I just wish we found some where where they could flow better it looks like they are kinda restricted where the are now.
scraffito is where you cover a wet slab of clay with underglaze and carve out designs from the glaze. The first step is to roll out your slab of clay about 1/4 an inch thick. Then you lay it on the tray that matches the shape you want and make sure everything is smooth. The next step it to cover the top of the slab in glaze. Once the glaze is mostly dry but while the clay is still wet you can start carving until you are happy with your design. By this time you're try should be dry enough to remove the clay from what ever you used to make the shape. The last step is to dip you piece in glaze, but before you do you must add wax to the bottom of the clay so that is doesn't stick to the shelves of the kiln. I think the most successful part of my piece is how even the glaze is and if I could work on anything it be to do a better job at cleaning up excess clay after I carved. I learned that wax can keep glaze from sticking to the clay.
The process of pit firing is pretty simple. You start off with a piece that is thick enough to stay together in the fire. Then you bernish the piece, which is my favorite part, this step insures at the piece is completely smooth. The smoother the piece is the more details it can pick up in the fire. Then you paint it with this stuff that will help the reactions more prominent. One you're happy you wrap it in tin foil with all of your materials and it's ready to be pit fired. This technique is different from all the others because it's fire makes the designs and you don't know that it will turn out exactly like you planned. I would do another piece like this if I had the time to do so.
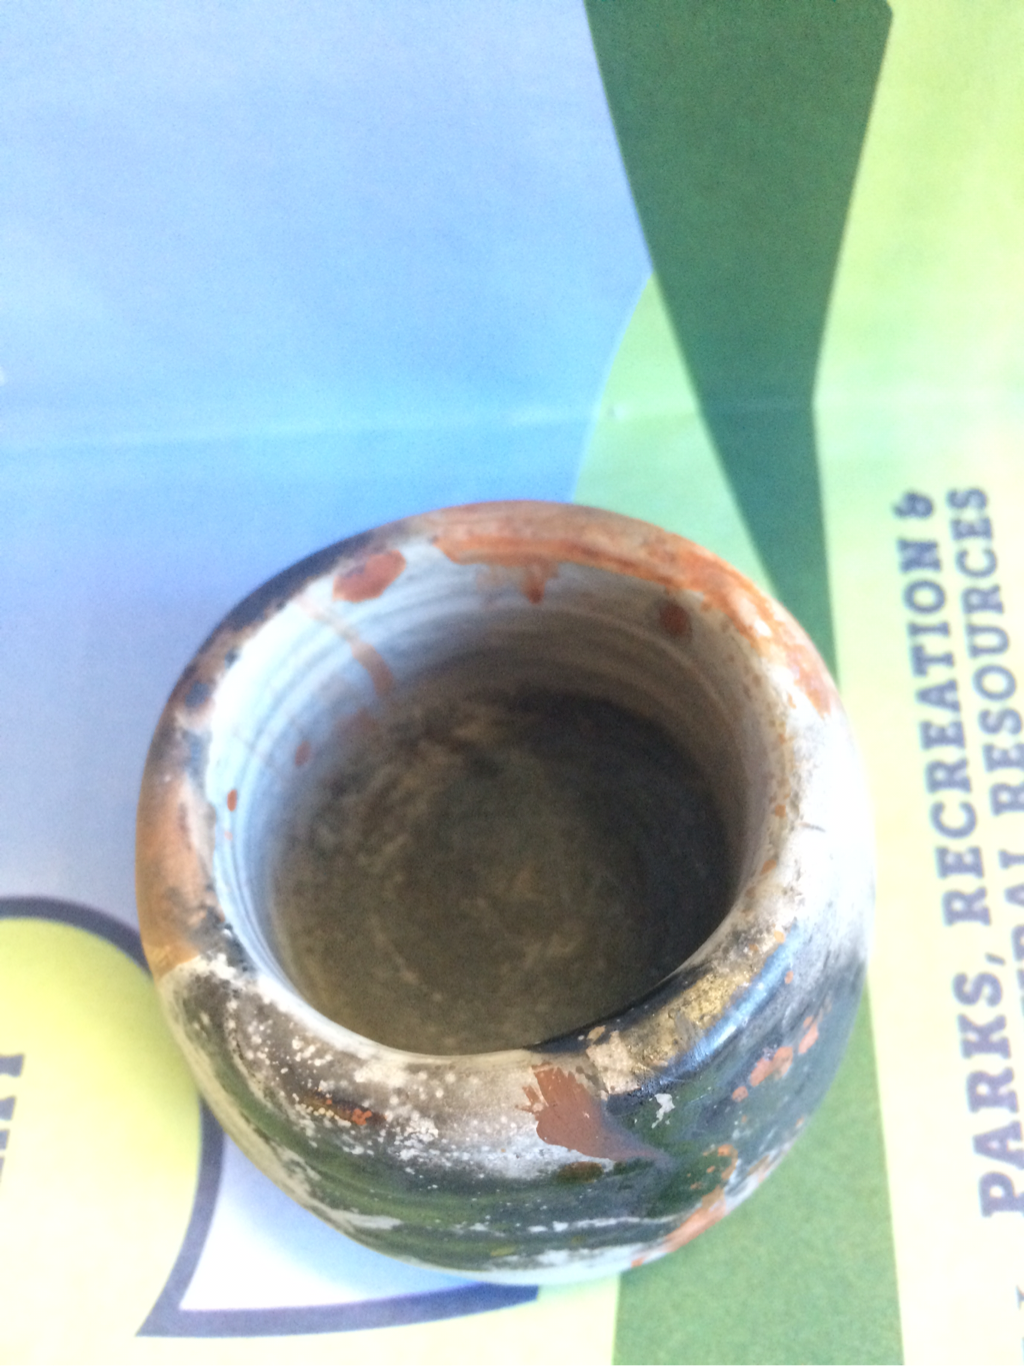 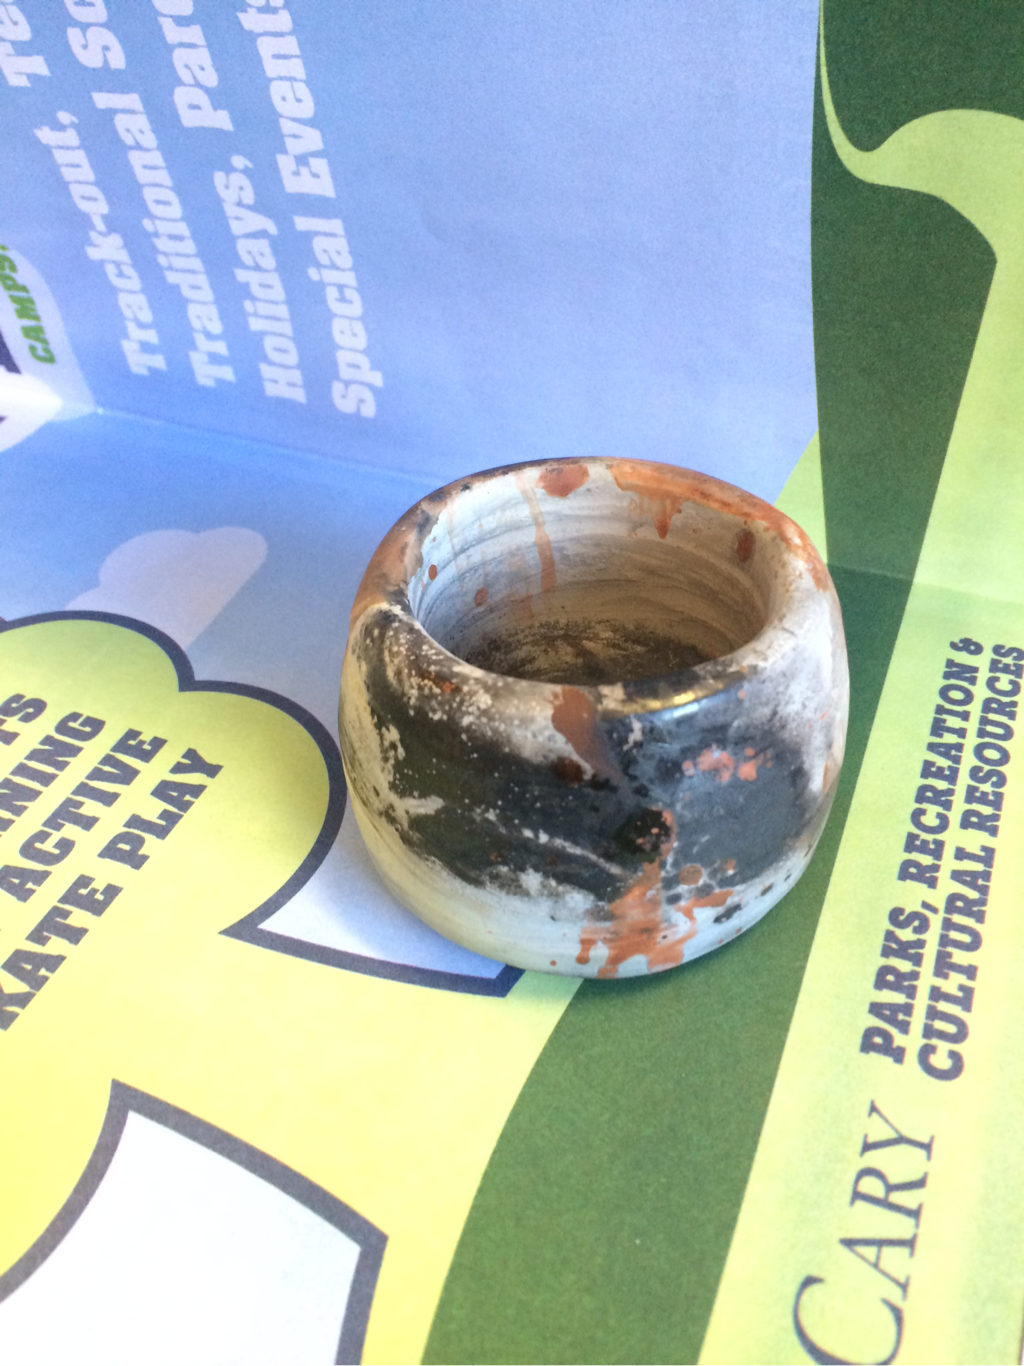 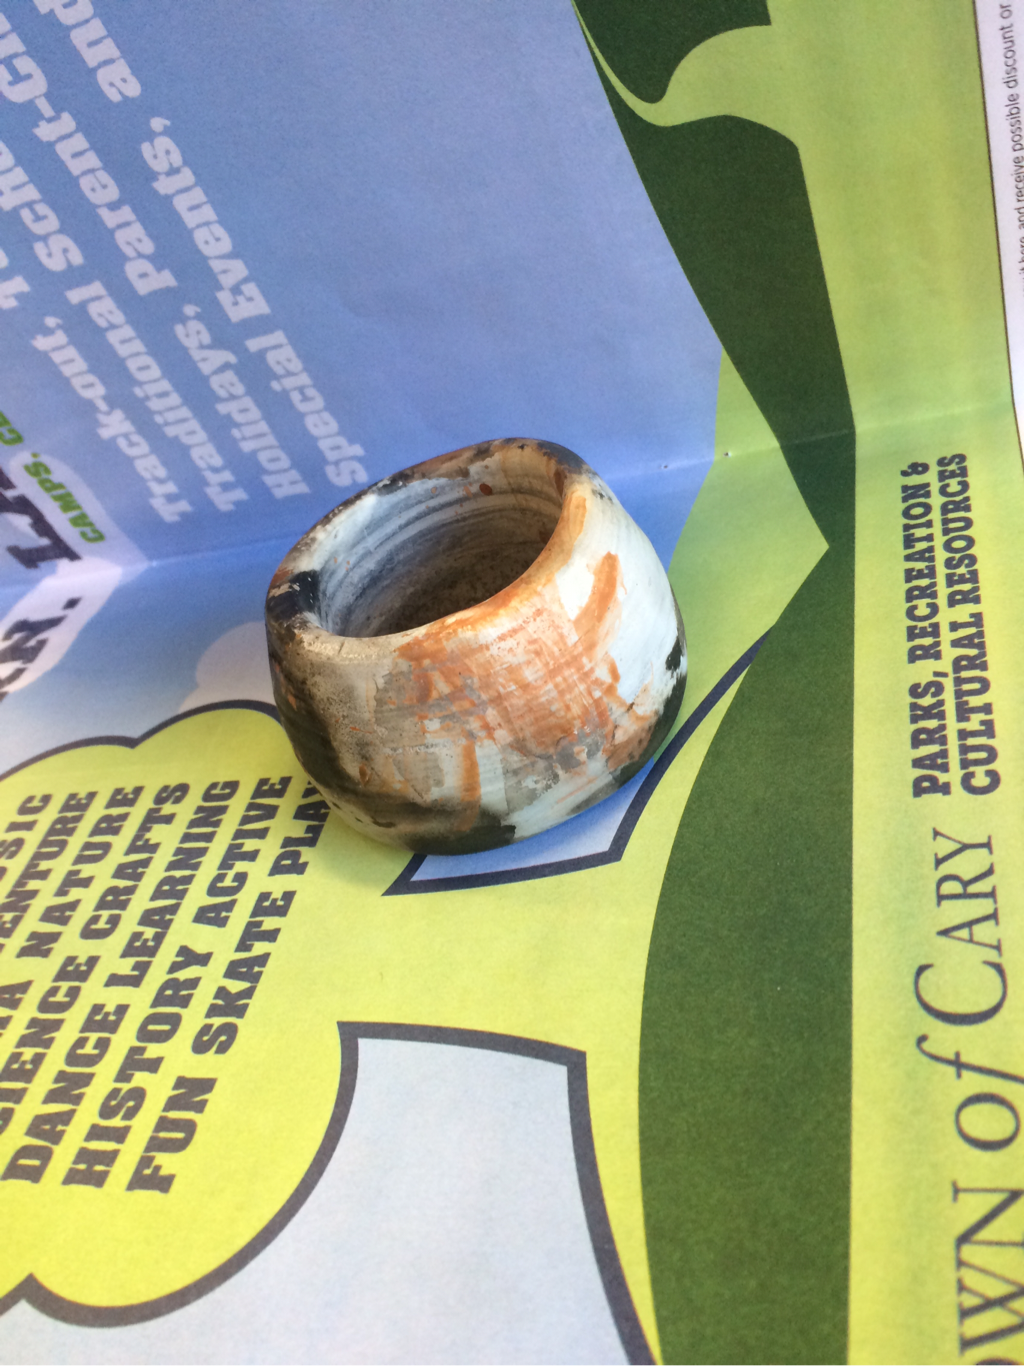 Pit firing is a type of ceramic making that uses pits of fire to cook the clay as opposed to using the kiln. You can add different salts, leaves, and other natural and man made materials to create designs on your piece. Foil saggar is the process of wrapping the piece inside on tin foil along with any material that you'd want to add that will make a design.
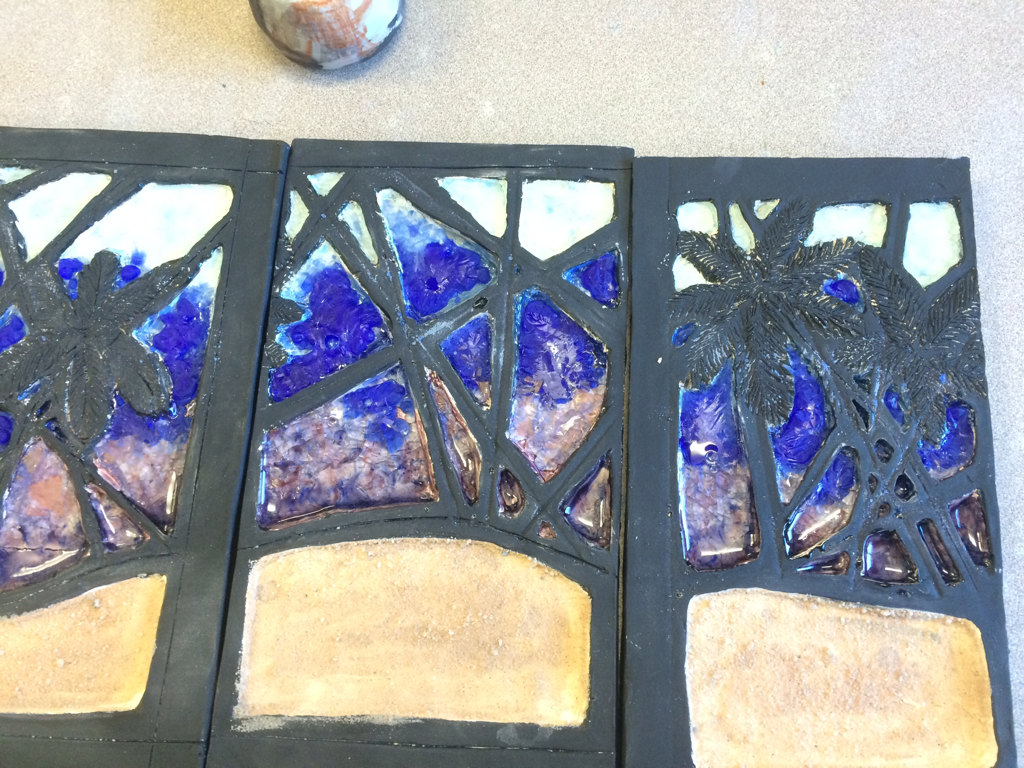 For my relief piece I decided to skip the mini tile and add other aspects to my piece. I decided that I would incorporate glass and sand into the deep portions of my piece. I choose to do a landscape of palm trees in front of a sunset and use glass to show the change of colors in the sky. I used actual sand on the bottom to add more texture as opposed to just using plain tan paint which is boring. The hardest part about this piece was the edges and boarders, keeping them straight and the same height and width. If I could improve on anything it would be the use of certain glass and know which ones would work best. I think I did really well on the lines and out lines on the palm trees that was my favorite part in creating the piece.
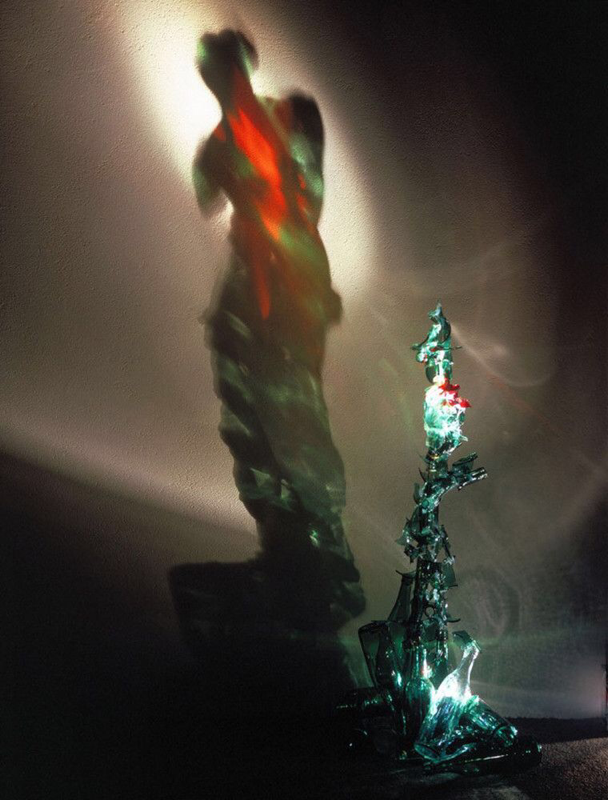
An artist that inspires me is Rashad Alakbarov. He does this amazing thing with glass where he incorporates light in his pieces to create this light show of sorts with the glass. Alakbarov held his first public showing in 2000 in Baku, Azerbaijan. Alakbarov emphasizes the character of the eastern world, global social problems, and current events. Most of his work is held in private collections in Azerbaijan, Turkey, Italy, and Russia. http://rashadalakbarov.com/ For my theme in sculpture two I have thought about going down many avenues as far as what I want to do with my art this semester so I made a list of several things that I may find interesting. I came to the conclusion that I want to experiment with glasses and how I can incorporate it into my pieces.
|

 RSS Feed